Showing posts with label I Made It. Show all posts

Monday, January 28, 2013

Dairy Free Mac & "Cheese"


Ah, Monday, we meet again. All of last week I was planning on posting this recipe and I just never got around to it. It seemed that this blog and myself were at odds last week. On that note, my kitchen stayed relatively clean and my laundry backlog is less than usual.
Recently I posted about how my daughter and I have started the journey into a dairy free lifestyle. You can read about that here if you missed it.
One of the struggles of having a two year old that is dairy free is that two year olds love cheese. Seriously. Tot-friendly foods like grilled cheese, quesadilla's and macaroni & cheese really cannot cease to exist in the life of a two year old. So what's a mama to do? Well, make those tot-friendly foods of course!
I decided to make some Mac & "Cheese" for my Little Lady, and didn't feel like getting caught up for hours browsing recipes on the internet, so I just made my own version. I mostly eyeballed it as I went, but the following recipe worked well for me.

Ingredients:
1 c. Elbow Noodles
1 Tb. Earth Balance Butter Substitute (I used the whipped spread, but there are several variations of Earth Balance that would all probably work equally as well.)
1/4 c. Almond Breeze Original
3/4 c. Daiya Cheddar Shreds

Directions:
In pot, bring water to boil. (No set amount, I just eyeballed this. Dash of salt if desired.)
Add 1 cup  elbow noodles to the boiling water.
Once noodles are soft, drain the water.
Add 1 Tb. of  Earth Balance spread and 1/4 cup almond milk. Stir.
Add 3/4 cup of Daiya cheese shreds. Stir until mixed well. Salt and pepper to taste.
Serve and Enjoy!!!
Photograph your happy tot.
 Do you have a favorite Dairy Free recipe?
*********************************************************************
 Have you "liked" me on Facebook yet? If not, what are you waiting for? Get over there! 
Are you following My {Not So} Glamorous Life via Google Friend Connect or BlogLovin'
Don't miss any of the fun! All you have to do is click "follow" on that button over there on the sidebar. Or Follow my blog with Bloglovin. Just click here!! C'mon, you know you wanna! 
I can also be found on Twitter under the handle @MyNotSoGlamLife


Monday, December 17, 2012

Complete, hearty meal for only 93¢ a person

If you're anything like me, you're always on the lookout for ways to feed your family a meal of substance, while still staying on a budget. Today I am going to share with you a meal that everyone in my family enjoys (really, everyone!) that is balanced and inexpensive. And super easy to make as well!
The approximate breakdown of this specific meal was about 93¢ per person. Now THAT'S what I call a Dollar Menu!
Ingredients:
Potatoes (98¢ per bag at Fresh & Easy)
Smoked Sausage or Kielbasa (I used two packages of John Morrell Smoked Sausage. 99¢ at the 99¢ Only Store)
Biscuits (Store Brand. 89¢ at local grocery store.)
Green Beans (Canned. Store Brand. 79¢ at local grocery store.)
Total for meal= $4.64
This fed a family of 2 adults and 3 children with some leftover. Often when I prepare this meal, I will add onion or bell peppers to the pan as well for added flavor with minimum cost.

Start by cutting up your potatoes and sausage. Put in a pan with a small amount of oil (your choice) and whatever seasonings or spices you wish to use from your pantry. Cook on medium heat, stirring frequently until potatoes are cooked through.

Warm your green beans and biscuits according to directions.

Serve and enjoy! To make it even more balanced and healthy, serve a green salad on the side.  


*********************************************************************
 Have you "liked" me on Facebook yet? If not, what are you waiting for? Get over there! Are you following My {Not So} Glamorous Life via Google Friend Connect or BlogLovin'? Don't miss any of the fun! All you have to do is click "follow" on that button over there on the sidebar. Or Follow my blog with Bloglovin. Just click here!! C'mon, you know you wanna! I can also be found on Twitter under the handle @MyNotSoGlamLife

Friday, November 2, 2012

Semi-Homemade Halloween

Hello friends! I hope that you all had a great Halloween. Did you Trick~or~Treat with your kiddos? Did you stay home and have movie night? Do you have any Halloween Night traditions?
I just wanted to quickly share with you our mostly homemade Halloween costumes for this year. I didn't want to go spend $40+ on store costumes this year, plus, my middle kiddo wanted to be "Agent P" and there was NO  "Agent P" costumes to be found. So we took the homemade route this year.
Big Boy was a Baseball Player Zombie. EasyPeasy. He already has his baseball clothes, and my uncle works at Halloween City, so he took him down there and they picked up the makeup together. I didn't spend a dime on Big Boys costume this year! WhooHooo!

Little Boy went as "Agent P" aka Perry the Platypus from the show Phineas and Ferb. He's obsessed. I had to piece this costume together, but I think it turned out ok. His was the most expensive of the three, running me about $40.00 total. But $20.00 of it was the two hats (fedora, and beanie) that he will get a lot of future use out of.

Little Lady was a Garden Fairy.  With a little help from Target and the 99¢ Only Store, her costume ran me about $8.00 total.

And finally, I'd like to share a quick glimpse of my last minute Halloween mantel. I literally waited until 2 days before Halloween to put this together, so I feel like it turned out pretty good for being an afterthought.
*********************************************************************************
Have you "liked" me on Facebook yet? If not, what are you waiting for? Get over there!
Are you following My {Not So} Glamorous Life via Google Friend Connect or BlogLovin'? Don't miss any of the fun! All you have to do is click "follow" on that button over there on the sidebar. Or Follow my blog with Bloglovin. Just click here!! C'mon, you know you wanna!
I can also be found on Twitter under the handle @MyNotSoGlamLife  

Thursday, October 25, 2012

Pumpkin Spice Cream of Wheat

The month of October is when every Pumpkin Spice recipe on Earth finds it's way out of the recipe boxes and cook books and onto our plates. I've made a few batches of pumpkin muffins already, and they were yummy! But I was craving something hot for breakfast. I've seen a few different recipes for Pumpkin Oatmeal floating around the internet, but I wanted to mix it up a bit.
I decided to pull my box of "Cream of Wheat" (ok, I used the store brand, but same diff) out of the cupboard and to try my hand at creating a Pumpkin Spice Cream of Wheat.
Cream of Wheat is a  hearty, filling breakfast food. Add to it healthy, low calorie pumpkin and that's a good deal! This breakfast will keep you full for hours, isn't too bad on the calories, and feels almost like an indulgence. (To learn more about some of the health benefits of pumpkin, click here. Good info!) 
I started with my hot cereal mix, and my Pumpkin Pie Spice.

I began to prepare the cereal as directed. For this instructional, everything is based on a single serving of the hot cereal. To make more, you would simply adjust your ingredients appropriately.  I took 1 1/2 Tbs of pumpkin puree and to that I added 1/2 Tsp of Pumpkin Pie Spice.

From there, I added 1/2 Tbs of milk, and 1/2 Tbs of brown sugar. I blended the puree, and added it to my hot cereal (which had just finished).

I gave it a good stir, and then put it in a bowl to eat. It was very tasty, however this recipe does produce a pretty mild "pumpkin" flavor. If you like it more bold, then feel free to experiment with your measurements.


All in all, I am very pleased with my experiment. I enjoyed it, and so did my Little Lady, so I do have plans to make it again. Next time I make it, I may even double the amount of pumpkin I add to it. Also, I wanted mine a bit sweeter, so I sprinkled it with a half packet of Splenda after it was in the bowl.
Give this a try if you're in the mood for a hot, tasty fall breakfast!
*********************************************************************************
Have you "liked" me on Facebook yet? If not, what are you waiting for? Get over there!
Are you following My {Not So} Glamorous Life via Google Friend Connect or BlogLovin'? Don't miss any of the fun! All you have to do is click "follow" on that button over there on the sidebar. Or Follow my blog with Bloglovin. Just click here!! C'mon, you know you wanna!
I can also be found on Twitter under the handle @MyNotSoGlamLife  

Tuesday, October 23, 2012

Don't Eat This Cake

Ok, so here's the thing. Until a few weeks ago, it's very possible that I am the only woman on the face of the planet to have never made a diaper cake.
True story.
However, a very dear friend of mine (I always say I want to be her when I grow up) was recently handed a new baby. Like, literally handed. Not in the hospital, but a social worker called her asking if she would like to adopt a little girl who was given up (safely surrendered) by her birth parents. So within a matter of a few weeks, she became a new mother once again. With no baby stuff left from her prior children.
That just wouldn't do. She needed some "stuff".
A bunch of us pooled together to get her some Target gift cards. But I love presentation. And I love thoughtful gifts. I decided that this would be a perfect time for me to try my hand at making a diaper cake.
For my very first one, I'm pleased with how it came out. And my friend was more than happy to receive it.

If you're one of the few who's never made a diaper cake, it's super easy! First, simply gather your supplies. Whatever baby items you choose. It can be a simple cake, or an extravagant one. This one was pretty simple.
Next, you will need to get small, clear rubber bands, and you'll need to roll those diapers. It's tedious work, grab a helper if you want.
After that, you simply begin to assemble your "cake". Incorporate the gifty items into the cake as you build it up. Use ribbon and other decorative touches to give it som flair.
And then, there you have it. Easy Peasy!
Have you ever made a diaper cake? Have you ever received one as a gift? What other variations have you seen or made?
*********************************************************************************
Have you "liked" me on Facebook yet? If not, what are you waiting for? Get over there!
Are you following My {Not So} Glamorous Life via Google Friend Connect or BlogLovin'? Don't miss any of the fun! All you have to do is click "follow" on that button over there on the sidebar. Or Follow my blog with Bloglovin. Just click here!! C'mon, you know you wanna!
I can also be found on Twitter under the handle @MyNotSoGlamLife      

Friday, October 12, 2012

Giveaway Winner AND a FREE Printable!

Happy Friday friends!! I hope that you all had a good week, and that this Friday finds you well.
Last night, my 200 GFC Follower Giveaway ended, and the lucky winner was: Laura E., who was already contacted via email. Congrats Laura!
For those of you who didn't win, I'd still love to share a special treat with you. I Created this printable, and I just love it for a kids room, a playroom, a classroom, or even a colorful kids/guest bathroom! (I also have a pastel version of it available, just comment or email me if you'd prefer that one!)

Click HERE for the PDF Download!

Enjoy! Have a great weekend!
*********************************************************************************
Have you "liked" me on Facebook yet? If not, what are you waiting for? Get over there!
Are you following My {Not So} Glamorous Life via Google Friend Connect or BlogLovin'? Don't miss any of the fun! All you have to do is click "follow" on that button over there on the sidebar. Or Follow my blog with Bloglovin. Just click here!! C'mon, you know you wanna!
I can also be found on Twitter under the handle @MyNotSoGlamLife      

Monday, October 1, 2012

Salted Chocolate Caramel Cake Pops (Balls?)

Good Morning. I wont even try to act chipper this Monday morning, so you don't have to either.
Monday came far too quickly this week (as always), but nonetheless, I hope that all of you had a delightful weekend.
On Friday I got a new oven. WhooHoo! My oven has been out of commission since July and that was not fun. Especially for someone who loves to cook and bake.
In any case, this weekend, I had to break it in a little bit. Last night for dinner, we had meatloaf. It's a family favorite around here.
On Saturday, The Hubs smoked a gigantic brisket. That was yummy. So while he was tending to the meat, I decided it was time for me to bake a dessert.
I've been wanting to try making cake pops for quite some time now, and if you remember last week, I mentioned how I'm loving Salted Caramel these days. One of those Salted Caramel items being the cake pops from Starbucks.

So it was only natural that I would want to try to make my own, right? I made my cake pops using the instructions that Little Miss Momma shared here, changing and tweaking a few steps along the way to better suit me. Plus, I didn't plan ahead for these, so I kinda did a quicky version. I had no drying place for them, so made them upside down, and I only had toothpicks, no lollipop sticks (they were more like cake balls than cake pops). For the chocolate coating I used CandiQuik. The flavor is great, but next time, I'll put it in a deeper dish, instead of the shallow pan. For the white chocolate, I used Toll House white chips, but next time, I'll use CandiQuik, as it's easier to melt and dries faster/nicer. For the caramel, I used Hershey's Caramel Topping, and I was happy with that. Then I sprinkled them with coarse sea salt.


They didn't turn out as gorgeous as many I've seen. And they surely weren't as perfect as the mass produced ones from Starbucks. But let me tell you, they were yummy! I also made some with no salt, because The Hubs can't deal with salty-sweet. I'm really anxious to make some when I have a bit more time available to put into them and have planned ahead better. I'm thinkin' pumpkin cake pops for a gathering later this month!
*********************************************************************************
Have you "liked" me on Facebook yet? If not, what are you waiting for? Get over there!
Are you following My {Not So} Glamorous Life via Google Friend Connect or BlogLovin'? Don't miss any of the fun! All you have to do is click "follow" on that button over there on the sidebar. Or Follow my blog with Bloglovin. Just click here!! C'mon, you know you wanna!
I can also be found on Twitter under the handle @MyNotSoGlamLife

Tuesday, September 25, 2012

Eating at Home Instead & Stuffed Sweet Pepper Poppers

Hello everyone! Over the weekend The Hubs and I made an effort to eat at home and to not throw any money down the toilet on eating out. Our efforts were successful, no meals out all weekend! However, him and I both know that there are a few keys to us staying home eating.

1) We need to feel like we aren't missing out on anything. So that means, the meal needs to be something we would order if we were eating out. But since we're eating at home instead, the cost is substantially lower.
2) We have to plan for it, and the effort it entails. Together, we'll plan out a fun and tasty meal and make a date of cooking together. On weekends, when we're smart enough we decide to stay home and eat, we enjoy cooking together.

This past weekend, we had a "cooking date" on Saturday night. I'd say, all in all the meal cost our family of five under $20.00. Compared to the dinner out we had the weekend before, that cost us $89.00 before the tip. YIKES!! We made baby back ribs, corn on the cob, baked beans, and dinner salad. Super yummy. Super cheap.
Before our meal, we whipped up one of our newest favorite appetizers. We made these about a month ago and loved them, so decided to go for it again. We didn't get the recipe for this anywhere, we just sort of whipped it up with what we had in the fridge, (doing an internet search did turn up several results for similar recipes) but it turned out so great!
I got a whole bag of sweet peppers at the 99¢ Store on Friday (more on that later in the week!).
So we took our peppers, and sliced them in half, lengthwise, removing the seeds. Then put them on a baking sheet.
After they were all spread out, I took some fresh Mozzarella cheese pearls, and put them in the peppers.
After that, I shredded some Colby Jack cheese and put that in the peppers. The Hubs fried up some bacon, and crumbled it. I put the bacon on top of the Colby Jack.
To finish them up, a light dusting of paprika and chili powder over the top.
Then The Hubs tossed those babies on the grill for a few minutes to soften the peppers and melt the cheese to ooey gooey perfection.
And finally, I topped them with some freshly diced tomatoes from our garden.
 No utensils needed, just pop these tasty morsels right into your mouth and enjoy!
These were even more enjoyable as we reflected on how much money we saved by not going out that night!
What's your favorite quick and easy appetizer?

*********************************************************************************
Have you "liked" me on Facebook yet? If not, what are you waiting for? Get over there!
Are you following My {Not So} Glamorous Life via Google Friend Connect or BlogLovin'? Don't miss any of the fun! All you have to do is click "follow" on that button over there on the sidebar. Or Follow my blog with Bloglovin. Just click here!! C'mon, you know you wanna!
I can also be found on Twitter under the handle @MyNotSoGlamLife

Thursday, September 20, 2012

DIY Crib Mobile Makeover

 I've been trying to get my ducks in a row to post this for over a week now. I needed to take the photos and edit them a bit, and it just never seemed to happen for me. So today, I'm happy to finally be sharing this fun project with you!
My Little Lady turned 2 in July. For her birthday she got some "big girl" bedding, and moved out of her original nursery bedding. Even though she's still in a crib, it was time for a fun change. She got her new, bright and cheerful, bedding and the room also was touched up with several other fun accessories.
She really loves her mobile though, so I didn't want to take it away. But it just didn't match anymore.

I also wanted to enhance her view a bit. I always felt like her original mobile (as are many of them on the market) was designed more for the people looking at it from a standing view than for a baby laying underneath it, and what's the point of that?
This view sucks. What baby would want to look at this?

I just kept thinking that I'd find a more colorful one on clearance somewhere, or at the thrift store. That never happened. It finally occurred to me that I could give her existing mobile a makeover!
I went to the fabric store, chose a bright and fun fabric, and got to work. I started by removing the pieces from the original mobile. Easy Peasy. Then I spread out on the floor, and just kind of started winging it. I didn't have a pattern, I didn't sew, and I didn't measure. Because seriously, I'm kind of a lazy crafter who has time for that kind of stuff?

I was really happy with the way it was looking by this point. Little Lady was watching me from nearby, and she was showing her excitement already.
I had gotten these great little felt flowers on Etsy from Blessed to Create. The price was great, and the colors were perfect!
So after not so much time and money, I had a fabulous new mobile, that my little lady could still enjoy for a long time, was much more esthetically pleasing, and her view was better now too.
I think this project would be great for anyone who's expecting, and finds a random mobile at a sale, or as a hand me down. Super cheap, super easy, and totally customizable. What's not to love?

I'm sharing this over here (there's TONS of other awesome link ups there too!)
Becoming Martha
*********************************************************************************
Have you "liked" me on Facebook yet? If not, what are you waiting for? Get over there!
Are you following My {Not So} Glamorous Life via Google Friend Connect or BlogLovin'? Don't miss any of the fun! All you have to do is click "follow" on that button over there on the sidebar. Or Follow my blog with Bloglovin. Just click here!! C'mon, you know you wanna!
I can also be found on Twitter under the handle @MyNotSoGlamLife     

Thursday, August 16, 2012

Upcycled Bill Box/Mail Holder

No, say it ain't so!! It's the last week of summer vacation. The last week of my blissfully calm, limited appointment and obligations schedule. The last week of pajama days, and water fights and sleeping in.
In only a few more days, I'll be back in the world of complete and utter insanity.
Rushing kids to get ready and out the door five days a week. Shuffling three kids off to three school locations, juggling Dr. appts and therapy schedules, volunteer days at school, board obligations, homework... Can't summer just last a little bit longer?
Like... forever? No? Fine, then excuse me while I go hide in a closet somewhere and pout.
Or... I guess I could just take these last few days of Summer vacation and squeeze every last drop of joy from them. I just can't decide if I should use this last week to relax as much as possible. Or if I should use it to have fun adventures with the kids, since we didn't "do" much all Summer.
*sigh*
On Friday I wrote about a few projects I would be sharing with you. Here is one of them.
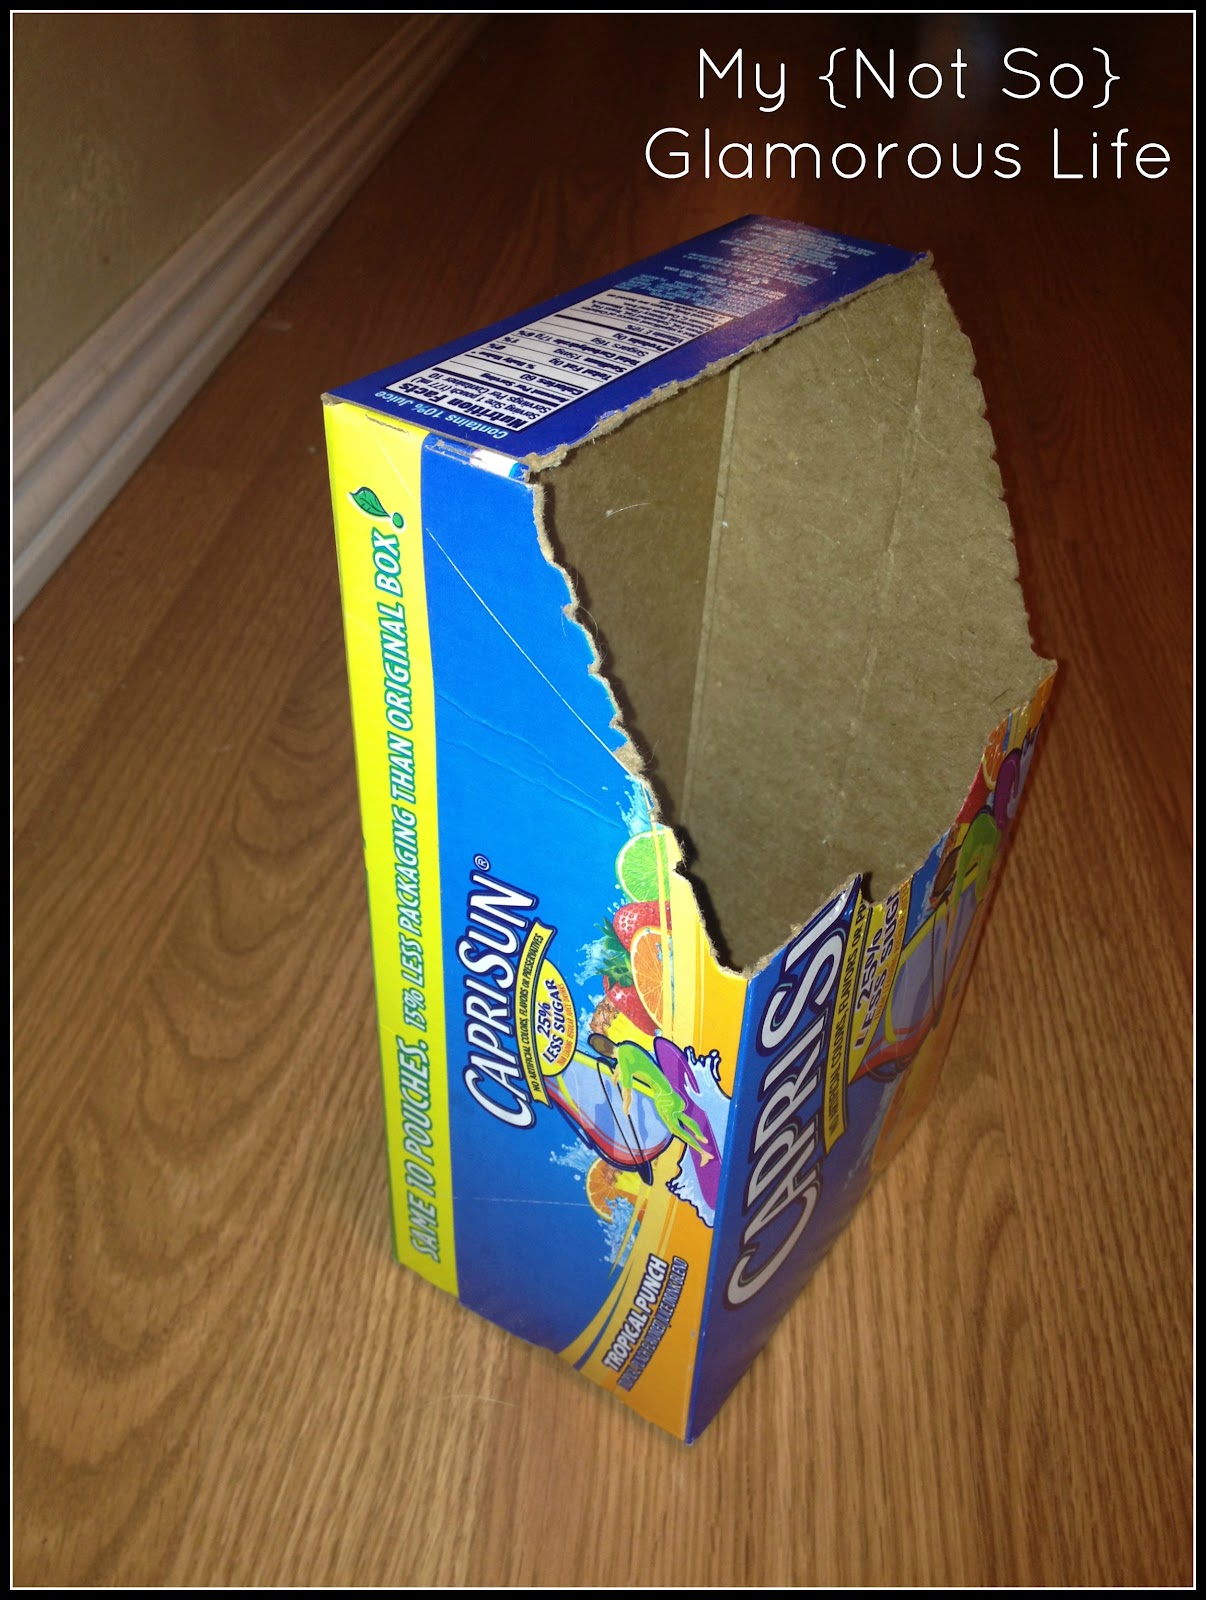
Last week I became irritated with the place where I was storing mail and bills. It wasn't a great location, and it was sort of hard to keep in order and to get to when I needed to. I decided that I needed to change it. I remembered that in my sons class, they would use old juice pouch boxes to create their "mailboxes" for the Valentine's Day celebration. So, while it's not going to be super heavy duty, that's what I decided to use for my bill box.

I started by selecting my scrapbook papers in coordinating colors (I used happy, bright colors, so offset the not so happy and brightness of the bills that will be filling it!). Then I simply wrapped the box in a similar fashion as a gift.

Once I was finished wrapping it, I created a label for it on the computer. I sent the label off to be printed at Staples. Once I got it home, I applied it to my box. Then I mounted the box near my desk and filled it up with all those dreaded pieces of mail. At least it's pretty.


*********************************************************************************
Have you "liked" me on Facebook yet? If not, what are you waiting for? Get over there!
Are you following My {Not So} Glamorous Life via Google Friend Connect or BlogLovin'? Don't miss any of the fun! All you have to do is click "follow" on that button over there on the sidebar. Or Follow my blog with Bloglovin. Just click here!! C'mon, you know you wanna!
I can also be found on Twitter under the handle @MyNotSoGlamLife

Tuesday, August 7, 2012

Back to School: Lunches

*sigh*
It's that time again.
Back to Chaos School. I know a lot of moms look forward to the kids going back, but I'll be honest with ya here; I love having my kids home. I love lazy mornings. I love the lack of committed schedule.
During the school year, my schedule is so rushed and so hectic. It fatigues me. And this year, I will have 3 kids at 3 schools, with three schedules. I'm kinda dreading it. What about you? Are you looking forward to the start of the school year? Or do you love summer vacation as much as I do?
Today I want to talk about lunch. To cut to the chase, most school cafeteria lunches are junk, plain and simple. They either taste bad, don't offer a nutritious selection, or are a waste of money. I prefer to pack my children's lunches. By packing their lunches I know exactly what they are getting, and for the most part, I know what they are consuming as well. Not to mention costs. My homemade lunches certainly cost less than three bucks a pop!
I think the Bento lunch trend is super cute, however, I can't see myself taking the time to cut out all those artsy shapes and molds and whatnot for the bento type lunches.
What I love to do, and what my kids love, is a fun, nutritious, kid-friendly lunch. My Little Boy calls them "homemade lunchables" (Lord knows, they are only a fraction of the cost of a real Lunchable!). They are kid-friendly, and usually get eaten because they are so fun!
Here are a few examples of lunches I have packed:
Kebabs. Kids love them. Bagel crisps. Sliced Veggies w/ Ranch. Homemade Trail Mix. Sliced berries. Yogurt and a drink.
Snack Break would be the pretzel/cheese dip. One drink.

Kebabs, again. It's a favorite. Homemade Trail Mix. Dried Bananas. Sliced Veggies. Bagel crisps. Pretzels. Probiotic Yogurt Drink.

Chicken Roll-Up (made from leftovers!) Wheat Thins, Shredded Carrots w/ Olives. Probiotic Yogurt drink. Trail Mix.

Olives (my kids love them!). Lunchmeat. Carrot sticks, sliced string cheese. Pretzels. Homemade banana bread bites. Raisins/yogurt covered raisins. Drink. Snack break= homemade trail mix & drink.

Homemade chicken nuggets w/ Ranch. Half banana. Oatmeal cookies. Carrot sticks. Drink.
Snack break= Quaker Stila Bits and drink.

Beef jerky. Ritz Crackers. Olives. Cheddar Cheese. Ranch Goldfish. Probitic Yogurt drink. Grapes. Trail mix. Drink.
Snack Break= Applesauce & drink.

My kids attend a Charter School, and the school gets out early (in exchange for short recess, and no lunch break). Kinder schedule is typical (release at 11:45am), but the upper grades get out about 1pm. So I don't have to pack lunches often, except for the days the kids have electives, field trips, etc.
Do you pack lunches for your children? Or do they get the cafeteria lunch? Does your cafeteria offer nutritious and yummy choices?
*********************************************************************************
Have you "liked" me on Facebook yet? If not, what are you waiting for? Get over there!
Are you following My {Not So} Glamorous Life via Google Friend Connect or BlogLovin'? Don't miss any of the fun! All you have to do is click "follow" on that button over there on the sidebar. Or Follow my blog with Bloglovin. Just click here!! C'mon, you know you wanna!
I can also be found on Twitter under the handle @MyNotSoGlamLife