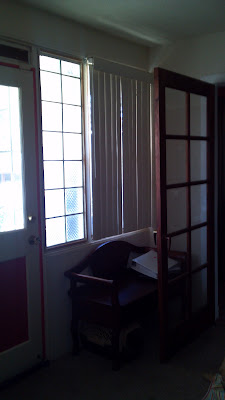
I had been going back and forth, wracking my brain trying to decide what to do with the windows in this room. They already had decent vertical blinds covering the windows, and I really didn't want to do away with those. But I did want to make them less boring.
And, I didn't want to sew anything if I didn't have to. I'm not best friends with my sewing machine. We'll just leave it at that.
 |
| Boring, vertical blinds. Excuse the horrid lighting. |
 |
| Again, with the lighting. It seems that there is no "good" time of day or night to photograph these windows. |
Do you remember the tablecloth I shared with you here? I bought it at my favorite thrift shop for only $3.99. It's big too. It had just the right color/pattern on it for the look I was trying to achieve in this room. I knew I wanted to do something with it for the windows... But it's a vinyl tablecloth, so I was trying to figure out how to make it look... not so vinyl?
For my first attempt at using the tablecloth for a window treatment, I pulled out some gauzy white panels that were in the living room when we moved into the house. I wanted to soften up the look of the windows, and I thought the white panels would do nicely. I'm glad I remembered them! Then I made a no-sew valance out of the tablecloth. This first attempt looked like this:
I can't say that it was love at first sight, but I did feel like it was an improvement. I decided to leave it be and "live with it" for a day or two to decide what I thought about it.
Two days later, I decided that it just wasn't what I wanted. The vinyl of the tablecloth just didn't make an ideal valance. But... what could I do???
Then, it hit me! Eureka!!!
I decided to use the existing top part (I have no idea what that thing is called. So I'm calling it "top part") to create a colorful window treatment, that was still clean looking. I took down the "top part" and got to work.
I cut the length of tablecloth that I needed, and simply wrapped it around the "top part". And then yes, I did secure it with electrical tape. It's not like the back of it will ever be seen. Right?? I slid the insert of the "top part" back into it's backing, and there I had my no-sew window treatment. I like the way my "top part" came out.
Overall, I'm pretty pleased with how this worked. In fact, I'm thinking of going through my house and re-doing all of the "top parts" (each of the children's room have the vertical blinds in them.). What an easy way to add a touch of color to the blinds!
(I shared this project on DIY Home Sweet Home: More the Merrier Monday!)


